

Introduction
Embark on a journey into the dynamic world of AGM (Absorbent Glass Mat) battery care! Perfect for the curious tinkerer, the eco-friendly solar adventurer, or anyone passionate about peak battery performance. AGM batteries are the silent powerhouses in our vehicles, emergency systems, and green energy solutions. They're tough, resilient, and ready for action, but even the mightiest need a bit of TLC. This guide isn't just about routine checks; it's about unlocking the secrets to longevity and reliability in your AGM battery. Prepare to become the battery whisperer your AGM battery didn't know it needed!
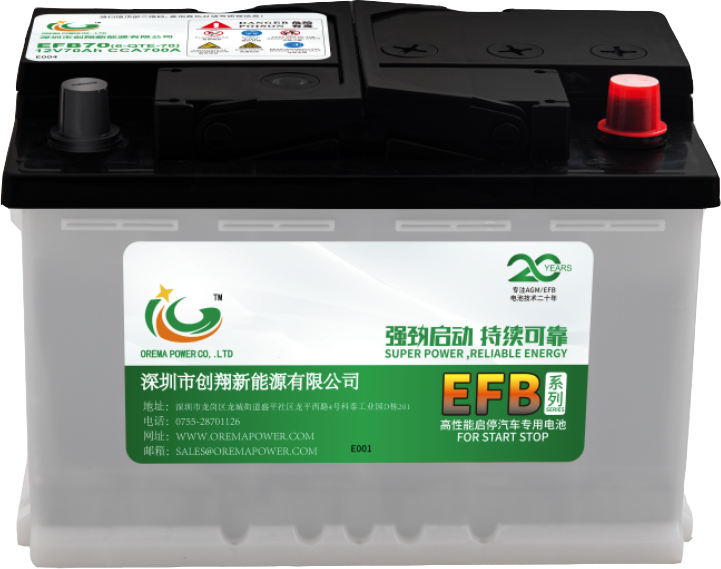
General steps for Testing the AGM Batteries
If the warranty on your battery has expired and you're noticing some issues, there's an initial step you can take to assess the health of your battery without spending extra money. By checking the battery's voltage, you can get an idea of its charge state. Here's how you can conduct a simple voltage test, but remember, safety first! Ensure you're wearing silicone-based gloves and protective goggles.
Here's the process:
- Preparation: Begin by disconnecting and powering down anything linked to the battery. Make sure the battery terminals are clean-any corrosion could skew your readings.
- Tools: Grab a voltmeter or multimeter for the job.
- Testing: Attach the device's cables to the battery terminals and note the voltage. Repeat this process a couple of times to ensure accuracy through averaging.
Understanding Your Battery's Health:
The voltage your battery shows can tell you a lot about its condition:- 12.7V to 13V: You're in the clear; your battery is healthy.
- Below 12V: It's time for a recharge. Use a standard charger and consider retesting post-charge.
- 10.5V to 11V: Your battery might be suffering from underuse. A thorough charge could breathe new life into it, assuming the internal components are still functional.
- Below 10V: Unfortunately, it's time to say goodbye. A battery showing voltage this low is beyond recovery and needs to be replaced.
If your battery is still under warranty and encountering issues, it's best to consult customer service for a check-up to avoid voiding your warranty.
Physical Inspection of AGM Batteries
A thorough physical inspection is your first line of defense. Start by ensuring the battery is in a safe, well-ventilated area and you're wearing appropriate safety gear (gloves and goggles). Check the battery case for any signs of damage like cracks, bulges, or leaks. These can be signs of overcharging, deep discharging, or internal damage. Also, inspect the terminals for corrosion or loose connections, as these can impact performance.Testing the AGM Battery with a Multimeter
A multimeter is a valuable tool in your battery-testing arsenal. To begin, set your multimeter to the DC voltage setting (usually marked as V with a straight line). Connect the red lead to the positive terminal and the black lead to the negative terminal of the battery. A healthy 12V AGM battery typically shows a reading between 12.6 to 12.8 volts. If the voltage is below 12.4 volts, the battery needs charging. Significantly lower readings can indicate a deeply discharged state or a failing battery.
Here's a step-by-step guide for conducting a voltage check on an AGM battery with a multimeter:
- Prepare Your Multimeter: Switch your multimeter on, ensuring it's set to the voltage measurement mode. This might require turning a dial or pressing a specific button on the device.
- Connect the Probes: Attach the multimeter's red probe to the battery's positive (+) terminal, and the black probe should be connected to the negative (-) terminal.
- Record the Voltage: A fully charged AGM battery typically shows around 13 volts, slightly above the 12 volts you might see marked on the battery itself. Should the voltage display below 10 volts, it indicates the battery needs recharging. After charging, take another voltage reading, and then a follow-up reading a few hours later. A decline of more than a volt or two in this subsequent reading suggests the battery may need replacing.
Testing AGM Battery with a Battery Tester
Dedicated battery testers provide more comprehensive insights. These devices not only measure voltage but can also conduct a 'health check' of the battery, assessing its charging capacity and overall condition. Follow the manufacturer`s instructions for connecting and operating the tester. Pay attention to indicators like 'State of Health' (SOH) and 'State of Charge' (SOC), which give a clearer picture of your battery's condition.Using a Carbon Pile Tester on an AGM Battery
Carbon pile testers, traditionally used for load testing, can be used on AGM batteries, but with caution. AGM batteries are sensitive to over-discharging. When using a carbon pile tester, apply a load equal to half the battery's CCA rating for about 15 seconds and then observe the voltage. It shouldn`t drop below 9.6 volts. This test stresses the battery, simulating real-world conditions, and can reveal weaknesses in its ability to hold a charge.
Identifying a Low Voltage in a 12 Volt AGM Battery
For a 12V AGM battery, a voltage reading below 11.8 volts is a red flag. This low voltage could indicate a partial discharge state or a deeper issue like sulfation, where lead sulfate crystals harden on battery plates, reducing its capacity and lifespan. Regular recharging and avoiding prolonged discharges are crucial for maintaining battery health.Load Testing AGM Batteries
Load testing simulates the battery's performance under typical operating conditions. For AGM batteries, a controlled load test is preferable. Use a battery load tester that can apply a load equal to half of the battery`s CCA rating for 15 seconds. Monitor the voltage during this period; a healthy battery should not drop below 9.6 volts. If it does, it indicates a loss of capacity or a failing battery.
To conduct an AGM battery load test, follow these steps, ensuring you retain the factual essence and key points, albeit with a refreshed style and tone:
- Identify the Ampere Rating: Look for the battery's label to find its ampere rating, denoted by CCA (Cold Cranking Amps) or, in the case of a golf cart battery, "Ah" (Ampere Hours) followed by a number.
- Calculation Step: Halve the ampere rating. This new number is what you should expect to see on your load test meter if the battery is in good, charged condition.
- Setting Up the Load Tester: Connect the load tester's clips to the battery terminals-red clip to the positive terminal and black clip to the negative terminal.
- Executing the Test: Run the load test for a duration of 10 to 15 seconds before halting.
- Interpreting the Results: The outcome should match your earlier calculation. A result that falls short by more than 10% signals a need to recharge the battery. After recharging, perform the test once more, and if the result still lags by over 10%, it's time to consider acquiring a new battery.
Inspection and determining the State of Charge of the battery(SoC)
Utilizing a digital multimeter or voltmeter makes this procedure straightforward. Once your battery is completely charged, link it up to the device for measuring voltage. A battery that's fully charged will typically display a voltage over 13 volts.As the battery discharges, the voltage displayed on your voltmeter or multimeter will decrease. By consulting the provided chart, you can accurately gauge the State of Charge (SoC) of your battery, using these voltage readings as a guide.
|
Voltage Reading |
Charge Percentage | Interpretation |
|
13V+ |
100% |
Good health |
|
12.5-12.8V |
90% |
Good health |
|
12.2-12.5V |
70% |
Moderate Health |
|
11-12V |
60% |
Heavily Discharged |
|
Bellow 11V |
40% or less |
Flat battery |
Do you want to know the battery charge?
Before embarking on the journey to gauge the charge level of your AGM or lead-acid battery, remember that these batteries don't come equipped with a built-in digital display to indicate their charge status. However, with the aid of tools such as a digital voltmeter, wattmeter, or multimeter, you can uncover this mystery. Here's a simplified guide to help you through the process:Preliminary Steps:
Ensure your battery is in isolation mode, meaning it's not connected to any gadgets or devices. This precaution is vital as connected devices could skew your readings, leading to inaccurate conclusions.
Measurement Process:
Kick things off by securely attaching your multimeter or voltmeter's cables to the battery terminals. It's crucial that this connection is done correctly to avoid any misreadings.
Next, adjust your multimeter to the correct setting or scale for battery voltage measurement and activate it.
Carefully record the voltage displayed by your device.
With the voltage information in hand, you can now translate this data into a more understandable format, such as the battery's charge state, by comparing it against established benchmarks or tables.
| Voltage Reading | State of Charge |
| 13V+ | 100% |
| 12.75V | 90% |
| 12.50V | 80% |
| 12.30V | 70% |
| 12.15V | 60% |
| 12.05V | 50% |
| 11.95V | 40% |
| 11.81V | 30% |
| 11.66V | 20% |
| 10.50V | 0% |
Does your battery have cranking power and capacity?
Exploring the muscle behind your vehicle's ignition: the battery's cranking capability is a measure of its ability to deliver a sustained amperage output over a set duration. This feature is critical for vehicles, where a robust cranking capacity ensures swift engine starts, while insufficient power might leave you stranded.To gauge your battery's cranking prowess, the load test is your go-to procedure. This test momentarily draws significant power from the battery, usually for about 10 to 15 seconds, to assess its performance.
Here's how you can manually check your battery's current cranking capacity using a voltmeter and a specialized battery tester:
- Begin by correctly attaching the voltmeter to your battery's terminals.
- Record the voltage. Batteries in good condition usually register above 12.6 volts, indicative of their nominal 12V status, which varies with charge levels.
- Next, hook up the battery tester and switch it to the cranking amp mode.
- Enter your battery's CCA (Cold Cranking Amps) rating into the device.
- Initiate the test. The device calculates and presents data including State of Charge (SoC) and overall health.
For a comprehensive battery evaluation:
Conducting a heavy-duty load test is paramount for an accurate health assessment. This involves using a battery load tester to exert a significant amperage draw. A battery maintaining voltage well during this test is considered healthy.
Ensure you know the Cold Cranking Amp rating beforehand. An additional voltmeter may be necessary if your tester lacks one.
Connect the tester to the battery, matching positive to positive and negative to negative terminals.
Verify the voltage on the tester or voltmeter; a fully charged battery should read about 12.5-12.6V.
Proceed with the test by manually or digitally entering the cranking amp figure, completing this within 15 seconds.
Conduct this test thrice, allowing a 5-10 second rest between each.
A healthy battery will not drop below 10V during these tests. A fall below this threshold suggests the battery is failing and may need replacement or servicing.
Detecting a Dead Battery:
Regular use diminishes battery health gradually, necessitating routine maintenance and checks to avoid unexpected failures.
Routinely monitor the battery voltage.
A rapid decline below 12.6 volts at full charge suggests diminished charge retention.
Conducting immediate load or stress tests is also advisable.
A voltage dip below 10V during testing signals a dead battery.
Identifying a Dead AGM Battery:
A non-functional AGM battery struggles to power devices and cannot maintain its charge.A dead AGM battery will show a rapid voltage decrease when measured with a voltmeter.
During a load test at the specified CCA rating, if the voltage drops below 10V, the battery is considered faulty.
Enhancing AGM Battery Life:
Though AGM batteries are generally maintenance-free, certain practices can extend their lifespan.- Utilize anti-corrosive cables for connections.
- Regularly clean the battery terminals to prevent poor power delivery.
- Frequently check the battery voltage.
- Occasionally charge the battery fully with a standard automatic smart charger.
- Inspect for any physical damage.
- Maintain the battery at an optimal temperature to avoid rapid degradation.
- Avoid pushing the battery beyond its capacity limit.
Frequently Asked Questions (FAQs)
To round off, let's address some common queries about AGM batteriesQ: Can I overcharge an AGM battery?
A: Yes, overcharging is a risk, particularly with older chargers not designed for AGM technology. It can lead to excessive heat and pressure buildup, potentially causing the battery to swell or even burst. Always use a charger with an AGM setting to prevent overcharging.
Q: How often should I test my AGM battery?
A: Regular testing is key. A monthly voltage check and a more comprehensive test every six months is a good rule of thumb. However, if you notice any signs of weakness or irregularity, don't wait test it immediately.
Q: What's the best way to store an AGM battery?
A: If you're not going to use your AGM battery for an extended period, store it in a cool, dry place. Ideally, it should be kept at a partial charge state (around 12.6 volts), and you should top it up every three to six months to prevent deep discharge.
Q: Do AGM batteries go bad?
Just like any battery, AGM batteries come with a finite lifespan. However, what sets AGM batteries apart is their impressive durability. They are capable of delivering consistent performance for a period of 5 to 7 years, which stands out in comparison to other battery types.
There's a certain satisfaction in knowing that you're taking good care of your 12V AGM battery. With these tips and techniques, you're well-equipped to ensure its health and longevity..Regular inspections, voltage checks and proper charging methods are the panacea for keeping AGM batteries in top condition.
Read More:
What voltage should a 12V AGM battery be?